Cough, sniffle, whimper, repeat

The sad truth of life is that moms do not get sick days.

My human Petri dish has infected me with his germs, and I may cough up my left lung soon. Or get kicked out of my bed because my fever is probably burning my husband in his sleep. (Not really…he got me some Ben and Jerry’s last night to try and help my razor-blade throat… he is cool like that)

Sick or not, there is still laundry that needs doing, dinner that needs cooking, dishes that need washing, little boys with school projects and homework that need helping, and a myriad of other tasks that care not for the fact that I feel like death warmed over.

Ya know, this mom thing should come with hazard pay….

Halloween Eye Candy and a Harsh Lesson About Glue Dots and Following Directions

This weekend, my friend J and I saw these on the cover of Woman’s Day Magazine:

And we just had to make them. All we did was cover a Styrofoam wreath form in black duct tape, and then we hot-glued candy corn to it in alternating rows, starting on the outer edge. They turned out exactly like the picture from the magazine. If you want to try this project, and need more direction, go to the Woman’s Day website. They have all the instructions there, I checked. A word of warning—do not try to shortcut this by using glue dots. We tried, and all the candy corn fell off the next day. We had to redo the entire thing! Talk about a big Doh. Upon this realization, I used words that are not fit for public consumption. However, we forged on, and learned that following directions is sometimes for the best.

During the past month of Halloween crafting madness, I have purchased several Halloween books, and I wanted to pass along my two favorites.

The first is this one from Gooseberry Patch:

This book has been my favorite purchase this year. It has lots of cute ideas and recipes that do not require as much expense or expertise as say, Martha Stewart. Don’t get me wrong, I love Martha (I even have some big projects of hers in the works), but not everyone has the money, technical know-how or Yankee taste buds to pull some of her stuff off. This Gooseberry Patch book has things that are a little more manageable for creatively challenged people like me.

My other current favorite Halloween book is this gem:

My husband picked this one up for me, and it is loaded with cute, creative recipes that are not ridiculously difficult. The author is a mom herself, so the recipes are more practical for cooking in a busy family, and for a crowd. Also, unlike some Halloween recipes, most of the ones in this book are of food people will actually eat, instead of just the clever-looking, but not really appetizing food I’ve seen elsewhere. I can’t wait to try the Vanilla Pumpkin Spice fudge, but alas, there seems to be a canned pumpkin shortage in my town, so I am out of luck right now.

In completely unrelated news, my kid gave me his cold, so I am going to take some Day-Quil and hide under my desk for a while.

My Human Petri Dish

My youngest is sick today, which means we may as well all be sick. Just looking at our baby with his poor red nose, streaming eyes and honking cough is enough to make us all feel bad. I like it better when he is smiling and happy:


I hate it when either of my kids is sick. It’s like my whole subconscious goes on red-alert, and worrying about them becomes an annoying, but ever-present white noise in the back of my mind. I think this is one of those things that surprised me most about parenthood. Both my kids have a little section of my brain that is now permanently cordoned off, where all my worries, concerns and general mommy-ing run like a never-ending news-ticker. When they are sick, the peanut gallery of that section gets louder, and more distracting, and I am always slightly on edge until they are back to their happy, healthy selves.

God forbid this illness results in a trip to the pediatrician’s office. I already did a three-hour wait there once this month…I don’t want to do that again. There are few things in life I dread more than the pediatrician’s office. When I think about being trapped in a tiny room, waiting for hours, while other sick kids are screaming and crying in the background….well, let’s just say that’s enough to make me break out into a cold sweat.

And, in case you missed it, it’s a truth universally acknowledged that a child will always get sick on the weekend…usually on a Friday night about five seconds after the doctor’s office closes. My youngest jumped the gun by a few hours, but it is still Friday….*sigh* He is nothing if not predictable in his sickness.

A few days of cold medicine, Tom and Jerry reruns and lots of hugs should clear this right up…I hope.

Cool Mom Points…Or How to Turn a Cub Scout Meeting into a Self-Esteem Booster

If there is one thing I’ve learned about kids, it’s that they are visual creatures. Long before food ever hits their taste buds, they’ve already passed significant judgment on its’ appearance, and I honestly believe that their first impression predisposes them to like it or hate it. Hence, instead of disclosing to my boys that I was serving them sweet potato fries last week, I told them that I dyed their fries orange to celebrate Fall. Yep, I’m a liar, but they ate it, didn’t they?

For last night’s Cub Scout meeting, I was charged with bringing the snacks. My boys take a certain pride in the fact that Mom usually brings the homemade snacks, and I was determined to keep up appearances, and collect some Cool-Mom credit. I have to take my Cool-Mom credit when and where I can get it, since my husband is usually monopolizing the Super Parent title with his cool games and potty humor. That sneaky Dad….but I digress….

I found this recipe in Southern Living, and knew it was perfect:

(That’s their photo by the way)

They look exciting, but underneath all that multicolored bling, they are still plain old sugar cookies, and therefore definitely kid friendly. The recipe was very easy, and the end result was some happy Cub Scouts. You should try them next time you need some deceptively easy Cool Mom Points.

Sugar Cookie Pops

Prep Time 15 minutes
Cook Time 15 minutes

Ingredients
  

  • 1/2 cup butter softened
  • 1/2 cup shortening
  • 1 cup sugar
  • 1 cup powdered sugar
  • 2 eggs
  • 3/4 cup vegetable oil
  • 2 tsp vanilla extract
  • 4 cups all-purpose flour
  • 1 tsp baking soda
  • 1 tsp salt
  • 1 tsp cream of tartar
  • colored sugars and sprinkles of choice
  • white craft sticks for handles

Instructions
 

  • Beat butter and shortening at medium speed with an electric mixer until fluffy; add sugars, beating well. Add eggs, oil, and vanilla, beating until blended.
  • Combine flour and next 3 ingredients; add to butter mixture, blending well. Cover and chill dough 2 hours or overnight.
  • Shape dough into 1 1/2" balls. Roll each ball in colored sugar or jimmies in individual bowls, pressing gently, if necessary, to coat balls. Place 2" apart on ungreased baking sheets. Insert craft sticks about 1" into each cookie to resemble a lollipop.
  • Bake at 350° for 10 to 11 minutes or until set. Let cool 2 minutes on baking sheets; remove cookie pops to wire racks to cool completely.
Tried this recipe?Let us know how it was!

Fun with Hot Wax

In case you’ve missed it, my friend J and I have been on a candle-making binge. First, we figured out simply how to make them without burning my kitchen down. Now, we’ve moved on to jar candles as favors for the big Halloween party.

We found these jars (with lids) for dirt cheap at the glass factory outlet. We also bought enough votive glasses for our grandiose Christmas crafting plans, but we’ll tackle that project at a later date. Once we prepped our jars by sticking some pre-waxed wicks in them, we melted about three pounds of container wax that we picked up off the internet. Luckily, the wax comes with melting instructions, so even crafting dunces like us were able to figure it out (and I only got burned once…ok, maybe twice).

Once our wax was melted, we added color:

And scent (don’t worry, the instructions told us how much):

Note that on the side of that picture, you see some wooden skewers. These were the best buck I’ve spent in a long time. I got about 100 of them in the pack, and we’ve used them to stir the wax, and thereby save all my utensils in the process. Finally, we poured our wax into the jars:

They cooled into some pretty Halloween perfection:

Now, we just need some cute labels and ribbon to decorate the jars, and we will have one wonderful party favor for our adult attendees. After this project was complete (and we had a drink or two), we convinced ourselves to try a Martha Stewart project and use acorn squash as a candle mold for the leftover wax:

Which turned out better than we hoped, but still a little funky:

We’ll be generous and call that organic.

So, what have we learned about candle-making?

  • Buy online. You’ll get better quality, for less money. We got our wax, scent and colors from Nu-Scents, and it FAR surpassed the stuff we initially used from Hobby Lobby.
  • Invest in parchment to cover all work surfaces, as you will spill wax, and it’s a pain to get up.
  • Have good hot pads and don’t forget to use them.
  • Buy the wooden skewers to stir, and thank me later.
  • Your wicks need to be pre-waxed, or you can treat them yourself by soaking them in hot wax for a few minutes. The difference is a candle that will burn for hours, or burn down the middle in five minutes.
  • It’s pretty easy, so if this is a hobby that interests you, you should try it.

Halloween Party Invitations for the Creatively Challenged

We are knee-deep in planning our Halloween party, and our poor house (and bank account) is currently overwhelmed with projects, decorations, plans and the like. My husband and I both have a bizarre obsession with the Halloween, and usually over-do it if time and money allow. The past few years, life has forced us to tone it down a bit, but this year, we’re coming back swinging.

For the past two weeks, I studiously shopped around area craft stores, armed with various coupons, in hopes of coming up with a creative, homemade party invitation that did not require investment in expensive tools, like $20 edge punches or $30 stamps. I would rather spend that money on food and booze, thank you very much. I’ve been warring with myself to go cheap on the invitations (since they will just be thrown away anyway), but I still wanted to have something mildly original and interesting.

Here’s what I came up with:

First, the tools:

I found tri-fold black cards at Hobby Lobby, with matching envelopes:

I also got some vellum that can go through a printer, bright orange card stock (somewhat textured), Halloween ribbon and some 3D pumpkin stickers. Not pictured here are some glue dots and scrapbooking scissors that I already had.

My first step was to design the main content of the invitation on my computer, simply using some clip art and creative text-box placement on Microsoft Word. Once I did this, I estimated what size would fit on a 5 ¼ inch card, and figured I could print four invitations per vellum sheet. The end result looked like this:

Note that the personal info has been conveniently blurred for safety purposes. Once I had the invitation content, I started to construct the entire shebang. First, I cut the orange card stock down to 5 ¼ inches, which was the size of the inside surface of the black invitation cards:

I then trimmed the edges using some $1 scrapbooking scissors, so the orange cardstock would just fit inside the black invitation card with a sliver of black border showing. I secured the orange card stock to the invitation card with a couple of glue dots:

Next, I used another $1 pair of scrapbooking scissors to cut the vellum invitation sheets to a size I thought would be good, and secured them to the orange card stock for a layered look:

Again, some information is blurred to protect the innocent. Finally, I used some ribbon, glue dots and the pumpkin stickers to decorate the exterior of the cards:

The end result was a pile of cute, cheap invites for which I will still get the all-important cool Mom credit:

I only used a ruler once, and winged the rest of it, so I still got the warm fuzzies of making these myself, without the cost, expense or OCD melt-down of something more complicated. The plan is to address the envelopes with glitter gel pens, and use the sheet of gothic return address labels I made using Microsoft Word. I won’t show you those, because all you’d see is the safety-blur anyway.

Now, I can focus on the decorations…

Mwhahaha!

The Murphy’s Law of Weeknight Meals

On any given weeknight, my dinner plans sometimes go horribly wrong. Usually, I realize I have forgotten to purchase some crucial ingredient, or have assumed I had something hiding in the refrigerator that, in reality, disappeared days ago. At least once a week, I have a dinner that goes way off course due to my selective amnesia regarding my grocery situation. It’s times like these that necessity becomes the mother of invention, because plan or no plan, I have two yahoo children hovering in orbit around the dinner table.

The other night, I had an unexpected after-work dinner disaster, but I actually managed to salvage it into something pretty tasty. Realizing that, yet again, I was missing a huge component of the meal I had planned for, I turned to my pantry for a bit of last-minute improvisation. First, let’s look at the players:

So, I assessed what I had on hand, which was basically a few staples and some leftover Gouda from the weekend.

The all important Step One:

Pour yourself a glass of wine Cupcake, you’ve earned it.

With that mission accomplished, let’s turn toward the food. First, I seasoned the chicken breasts with a little bit of salt and pepper:

Then I browned them on both sides in my cast iron skillet in a mixture of butter and olive oil (so I could get some butter flavor without burning it to a crisp):

While that was cooking, I diced two shallots, for no other reason than I had bought those shallots, and since forgotten why I had bought them:

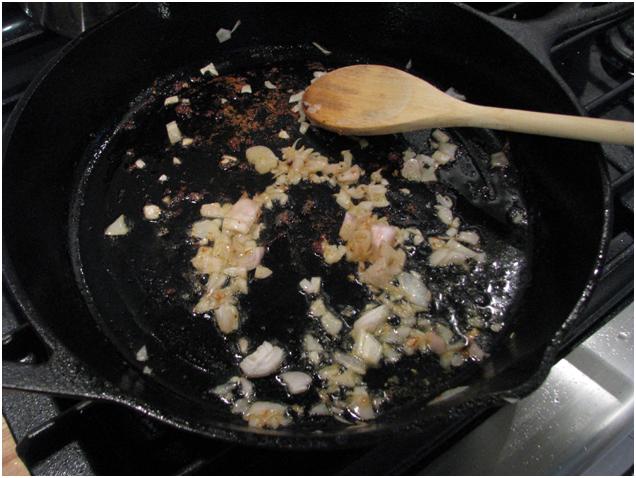
Once the chicken was brown and happy on both sides, I removed it from the pan, and added the shallots for a quick sauté:

I then added the undrained can of tomatoes:

Followed by the soup, thyme and some salt and pepper to taste:

I finally added the chicken back into the pan, and popped it into a 375 degree oven to finish cooking, as I needed the burner space on the stovetop. I probably baked it about 20 minutes, poured myself another drink, and then topped the chicken with the grated Gouda:

You can never go wrong with more Gouda…

Anyway, I whipped up some rice and squash, and the finished meal looked like this:

It may not be pretty, but it utilized everything I had on hand, and was dang tasty to boot. Dinner was saved, and the heathens were fed. Want to try my pantry experiment? Here’s the recipe (as best I can remember):

  • 2 Tablespoons Butter
  • 1 Tablespoon Olive Oil
  • 4 whole Skinless, Boneless Chicken Breasts
  • Salt and pepper to taste
  • 2 shallots, diced
  • 1 can (14 1/2 Oz. Can) Fire Roasted Diced Tomatoes, Undrained
  • 1 teaspoon Dried Thyme Leaves
  • 1 can (10.5 Oz. Can) Condensed French Onion Soup
  • 1 cup Shredded Gouda Cheese

Preheat the oven to 375 degrees.

In a 12-inch oven-proof skillet, melt butter in olive oil over medium-high heat. Sprinkle chicken breasts with half of the salt and pepper, reserving the rest of the salt and pepper for the sauce. Pan-fry the chicken until both sides are golden, but chicken is not cooked through.
Remove chicken from skillet; set aside.

Add shallots to the skillet; cook and stir until softened, 3-4 minutes. Add tomatoes, soup, thyme and remaining salt and pepper; cook until bubbly.

Return the chicken to the skillet. Place in the preheated oven and bake, uncovered, for 15-18 minutes or until the chicken is cooked through. Remove pan from oven; sprinkle chicken with Gouda. Return to the oven and bake until cheese is melted, about 3-5 minutes more.

I’m Not Rabid….Yet….

It’s late….and I’m tired. Unfortunately, work has kept me out of my office, away from my computer and trapped in a land with extremely limited Diet Coke rations.

No, it’s not technically Hell, but close enough. While I was initially thrilled about this break in the office routine, the revelation that there would be no wi-fi, and the Diet Coke machine was nine flights of stairs away, has ensured that I have been twitchy, snappy and generally unpleasant to be around.  Hopefully, we will return to our regularly scheduled programming soon.

In the meantime, I’ve managed to play 6 million games of Bejeweled on my iPhone, learn the true capacity of an iPhone battery, and discovered that no wi-fi, no Diet Coke and a dead iPhone are the three horsemen of my personal apocalypse.

Friday can’t come soon enough….

Things We Lost in the Fire

A few years ago, just about the time I was nine months pregnant with my youngest child, our house burned down.

It started out like a usual day…we visited Granny for a while, and then headed home so that my oldest, who was just shy of two, could take a nap. Being enormously pregnant, I decided to try and nap as well, because sleep was in short supply with a 10-pound baby kicking my ribs each night. Just as I was about to doze off, I realized that I could hear leaves rustling at a ridiculously high volume, and the sound seemed to be coming from INSIDE the house. I got up, and opened the laundry room door, only to have a wall of fire rush out to meet me.

I grabbed my son and made it out without even shoes on my feet…not good in February. One hour later, despite the heroic efforts of our volunteer fire department, we were homeless, without even a change of clothes to our name. The only saving grace of that hour was my husband, who ventured into the smoking rubble to retrieve a pair of my slightly melted shoes, and a kind fire-fighter who left the scene and returned with a package of diapers, baby wipes and a box of sippy cups.

The next weeks were a blur. Losing everything was bad enough, but losing everything when I was in imminent danger of giving birth at any second was like an endurance test of my sanity, and my poor husband’s patience.

In between the months of moving, rebuilding, birthing and recovering, we managed to fish quite a few things out of the rubble. Most of these things, we tossed in boxes and shoved into storage to try and salvage at a later date. Some things were saved, most were not.

This weekend, my husband was cleaning the garage, and came across a forgotten box of soot-covered items. He managed to recover a picture of me and my best friend from middle school, a piece of my aunt’s pottery, a commemorative beer stein from my senior class, and a picture from my climbing trip to the Grand Tetons.

It’s amazing that, six years later, these items can still bring me to tears. Though we emerged from the fire better, stronger and happier than ever, I still sometimes find myself looking for something that I’ve forgotten was lost. It’s a bittersweet joy when something is found.

Why Am I Always the Bad Guy?

My boys have a severe affinity for all things electronic. Between a house full of computers, a Wii, several handheld video game contraptions and a bucket of rechargeable batteries, I am sometimes amazed that the DEA is not busting in our door, demanding to know why our house lights up like a Christmas tree on an infrared map.

My husband has a computer the size of a large appliance, and it frequently is running on whatever game-of-the week he has found for the boys’ general amusement. This week, it’s some craziness involving cartoonish zombies waging an epic battle against smiling flowers and shrubbery. I don’t pretend to understand, and they can’t drag themselves away long enough to explain it to me:

While my youngest avoids brushing his teeth before school, he continues on his quest for zombie-domination. And it’s kind of hard to take Mom’s dire threats of lateness seriously when you have Daddy behind you, cheering you on:

*sigh*

Boys……