Adventures in Homemade Baby Food—Part 2


Back when Bean started solid food, I posted my plan to do the homemade baby food thing. After struggling with two of the pickiest eaters ever born, I hoped that making Bean’s food would help avoid a repeat of the epic toddler food wars. My reasoning was simple: jarred baby food tastes like ass, and if I won’t eat it, why would I expect my kid to choke it down with a smile on her face? Not to mention that fresh food is probably better for her than crud that’s been hibernating on the store shelf for months on end.

Though it is extra work now and then, the homemade baby food plan is a success thus far. Bean will eat anything I put in front of her, and now that she is older, I mostly just feed her whatever we are eating (after a few pulses in the food processer). Last week she plowed through chicken and dumplings, King Ranch Mac and Cheese and fresh pineapple with Greek yogurt. She’s already consumed more fruits and vegetables in five months than her brothers did in their first five years. Maybe, just maybe, I won’t have as theatrical of a battle with her as I do with the rest of my brood.

In my never-ending quest to get less fat, I’m always trying to find the balance with my family and food. I don’t want to be the cliché mom who tries to force her diet onto her family, or drag everyone along on my “get healthier” bandwagon. For that matter, I’m not really into the “diet” concept either; I like to eat and my love of cheese, chocolate and fried anything will never be denied. However, I’ve slowly been tweaking our everyday food choices and preparations in order to find a happy medium between my desire for slightly better nutrition, and their inherent distrust of anything not nugget shaped. I steam or roast veggies, while having a lighter hand with the butter or oil. I stopped buying canned vegetables (with the exception of Le Sueur peas, lest the Heathens riot), and stick with fresh or frozen. Even if it makes me the meanest mom ever, I limit the Heathen’s treats and soda intake, because I want them to learn the concepts of portions and moderation. I’m not opposed to the treats, but they need to realize the difference between a “treat” and everything else they eat.

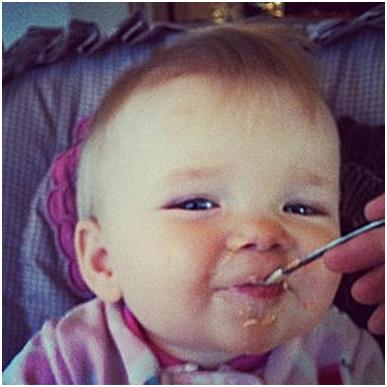
As for Bean, every time she tries a new food, only to plow through it a light speed, I breathe another sigh of relief. This homemade baby food experiment has been completely worth the effort, and the fact that I’m not blowing money on jar after jar of yucky crap makes my budget a little bit less sad. But then, I open my electric bill and my budget gets suicidal…but that’s another story.


Dead-Chicken Smells and Sweet Little Boys—Another Day in Our Zoo

The Heathens are in deep trouble today. But, to fully understand the how, you have to understand the why.

So, grocery shopping at my house is an exhausting gauntlet that I dread every week. I usually go on Saturday or Sunday, and it takes nearly half the day to accomplish. Planning the menus, making the lists and clipping the coupons takes a good chunk of time, but then I trek to two different stores, usually with Bean in tow. I know what you are thinking…why, dear God, why? Well, that’s what it takes to keep our family of five fed on a meager budget. Scoff if you want, but the first time my husband saw $70 come off the register total because of my time-consuming planning, he acknowledged that I clearly had a method to my grocery shopping madness.

Anyway, considering that I spend half a day planning and purchasing the groceries, my husband and kids are charged with unloading the car and putting everything away. By the time Bean and I make it home from our expedition, she needs feeding, changing and a nap, so I am otherwise engaged during the unloading process. Our system seemed fine, but I should have known never to grow complacent when Heathens are involved.

I went grocery shopping on Saturday, and as usual, left the Heathens to unload and my husband to put it all away while I dealt with a hungry Bean. We had a great holiday weekend thereafter, and nothing seemed amiss until I opened my car door yesterday (having not left the house since Saturday). The wretched smell that assaulted me nearly knocked me over. I ran to my trunk, popped it open, and found all of the chicken, cheese and vegetables I had bought rotting away in the sunny, 70 degree heat. The Heathens had been in such a hurry to escape grocery detail , they left 1/3 of the groceries in the trunk…for four days. After trashing the rotten food, and attempting to air out my car, it still smells like death warmed over, and my grocery budget for the week was blown to smithereens. I picked the Heathens up from school (with the car windows rolled down), and proceeded to lay into them about responsibility, accountability and the misery of my dead-chicken-smell car. I told them they were BOTH in trouble and rattled off the laundry list of punishments that their father and I had agreed upon, including grounding from all electronics and the loss of their allowance.

Well, Bear, being the sweetest kid that ever lived, tried to get his brother off the hook. He pipes up with “Mom, I think I may have shut the trunk, so I think it really was my fault.” Now, I know for a fact they both had a hand in it, but Bear was willing to take the whole blame so his brother wouldn’t lose his video game time.

His sweetness nearly did me in, but luckily the dead-chicken smell kept me strong. I managed to stick to my guns, but deep down, I just wanted to kiss the little booger senseless. So, the Heathens had a day of no TV or video games (oh, the horror!!!), and I still have a dead-chicken car. It’s just another day in paradise around here.


I May Need a Week on the Treadmill

For my friend J’s birthday this weekend, I offered to make her any dessert she wanted. Her only request was something chocolaty and peanut buttery. I found this recipe online, and let me tell ya, it is dang tasty. Like daaaaannng tasty. If you like chocolate and peanut butter, I urge you to try it. Just don’t blame me when your skinny jeans have to take the week off.

Mmmmm …King Cake…

It’s a well-documented fact that I have a crippling weakness for King Cake. From Epiphany to Mardi Gras, I feast to the point of ridiculousness. We typically purchase our King Cakes from a local place, but at more than $20 bucks a pop, it’s a pricey treat that we really can’t justify in our meager budget this year. Alas, necessity is in fact the mother of invention; my need for King Cake got the better of me last weekend, and we tried our hands at making them at home. The process was much easier than I anticipated. If you have a stand mixer, this recipe is easy-peasy, because the dough hook attachment will do all the kneading for you.

King Cake

Notes

This recipe will make two King Cakes, one with the standard cinnamon-sugar filling, and one with a cinnamon cream cheese filling. Dude, if you are going to put forth the effort, you might as well go all-out.
Ingredients
PASTRY:
  • 1 cup milk
  • 1/4 cup butter
  • 2 (.25 ounce) packages active dry yeast
  • 2/3 cup warm water (110 degrees)
  • 1/2 cup white sugar, divided
  • 2 eggs
  • 1-1/2 teaspoons salt
  • 1/2 teaspoon freshly grated nutmeg
  • 5-1/2 cups all-purpose flour
FILLING:
  • 2 cups packed brown sugar
  • 2 tablespoons ground cinnamon
  • 1 cup all-purpose flour
  • 1 cup melted butter
  • 1 (8-oz) package cream cheese, softened
  • A few tablespoons of milk for thinning cream cheese filling
FROSTING:
  • 2-1/2 cups powdered sugar
  • 2 teaspoons vanilla extract
  • Juice of half a lemon
  • A few tablespoons of milk for thinning icing
  • Purple, green and yellow decorator sugars
Directions
  1. Scald milk, remove from heat and stir in 1/4 cup of butter. Allow mixture to cool to room temperature. In a large bowl (or the bowl of your mixer), dissolve yeast in the warm water with 1 tablespoon of the white sugar. Let stand until creamy, about 10 minutes.
  2. When yeast mixture is bubbling, add the cooled milk mixture. Whisk in the eggs. Stir in the remaining white sugar, salt and nutmeg. Beat the flour into the milk/egg mixture 1 cup at a time (I use my mixer with the dough hook attachment). When the dough has pulled together, turn it out onto a lightly floured surface and knead until smooth and elastic, about 8 to 10 minutes (or continue using the mixer and let the dough hook to do all the work!).
  3. Lightly oil a large bowl, place the dough in the bowl and turn to coat with oil. Cover with a damp cloth or plastic wrap and let rise in a warm place until doubled in volume, about 2 hours. When risen, punch down and divide dough in half.
  4. Preheat oven to 325 degrees. Grease 2 cookie sheets or line with parchment paper.
  5. To Make Fillings: Combine the brown sugar, cinnamon and flour. Pour the melted butter over the cinnamon mixture and mix until crumbly. Divide this mixture in half, setting one half aside to use as the plain cinnamon filling. Add the cream cheese to remaining cinnamon mixture, and beat with an electric mixture until smooth and spreadable, adding milk a tablespoon at a time to help you achieve this consistency.
  6. Roll dough halves out into large rectangles (approximately 16x22 inches or so). For the plain cinnamon cake, sprinkle the reserved cinnamon filling evenly over the dough and roll up tightly like a jelly roll, beginning at the wide side. Bring the ends together to form an oval shaped ring (and try to put forth a little more effort in the shaping than I did…I blame the cocktails). For the cream cheese cake, roll out the other half of the dough and spread the filling evenly over it to ¼ inch from the edges. Roll up and shape into ring as previously described. Let the cakes rise in a warm spot until doubled in size, about 45 minutes.
  7. Bake in preheated oven for 25 to 35 minutes, until the top is lightly browned. Meanwhile, make the icing by combining powdered sugar, vanilla and lemon juice in a bowl. Whisk in milk a tablespoon at a time, until icing is thick but pourable. Pour icing over warm cakes and decorate with colored sugars.
Tried this recipe?Let us know how it was!

The Completely Free Compost Bin

January is never a fun month. Between crappy weather, post-holiday blues and the reminder that weight does not come off as easily as it goes on, I feel like January is one long trip to the dentist.

This week, however, the flowers began to peek through my brown lawn and my husband started the seeds for the garden, sure signs that Spring is on the way.

We’ve been planning several improvements to this year’s vegetable garden, including using only heirloom vegetables, a second round of planting in the fall and experimenting with vegetables we’ve never grown before. It’s an ambitious plan, and it’s going to require some work on to get it off the ground. We started by constructing this completely free compost bin:

Since we need to recycle more, cut costs and improve the less-than-ideal soil quality of our raised beds, I decided a compost bin was overdue. My husband was skeptical, but I vowed to come up with something that wouldn’t cost us a penny. By the power of Google, I formed a plan to construct a container out of discarded wooden pallets, so it could keep our compost pile contained (and therefore less likely to tick off our neighbors). We scouted around the dumpsters of local businesses for the pallets, and found four in very short order. We screwed them together using wood screws we already had on hand, after cutting one side in half to ensure we can reach in to turn the compost as needed. My husband also found some leftover screen that the previous owners left in our garage, and staple-gunned it around the inside to further secure the compost from escaping between the slats.

Not too shabby for twenty minutes and no dinero.

And that was just a gratuitous baby photo. Why? Because it’s Monday, that’s why.