

When our old house burned down in 2004, I basically got to rebuild it to my liking…within the confines of a very tiny insurance policy, of course. One way I splurged was by redesigning the kitchen layout to be a more open floor plan, leaving room for an island with a pot rack above it. I found a beautiful, but cheap pot rack at a home improvement store, and paid one of the carpenters $40 under the table to hang it correctly. This process involved chains, attic rafters and other things that my pregnancy brain did not want to worry about. It was $40 bucks well-spent though, because that rack did not flinch from having all my pots dangling from it. The rack also looked amazing; so much so that the lady who bought our house insisted that the island and rack stay as part of the deal.
The kitchen in the new house is definitely on the smaller side, and when we moved in, I was too tired and broke to think about adding islands or pot racks…I was lucky not to have to sell my soul to the moving company, let alone fork over more cash for the kitchen. My husband and I solved this issue almost immediately by creating this:

This wall was practically dead space, because to the left of this area is the back door. Therefore, no furniture could fit in this space without compromising the doorway, new cabinets included. With a little imagination and about $20 worth of materials, we made this area into a customized pot rack, thus solving the immediate problem of lots-of-stuff meets tiny, historic-home-kitchen.
First, we measured the wall and figured out how much space we had to work with. Then, we bought a sheet of peg-board from the local Lowes, and even had them cut it to size in the store. We could have painted the board if I had wanted to, but I thought the light brown color was just fine…besides, paint costs money and money was thin on the ground after the movers finished bleeding us dry. We also picked up a variety pack of peg-board hooks and accessories while there.
When we got home, my husband figured out that the peg-board needed to sit approximately ½ inch off the wall so that the hooks had room to attach and detach. He resolved this issue by stacking washers between the peg-board and the wall:

Once we had the peg-board figured out and positioned, my husband simply screwed it into the wall at various intervals around the border, making sure he was screwing into the studs. Should you ever try this, please understand that you have to secure any type of pot rack to a stud. Otherwise, the weight of the pots will probably rip the thing down, destroy some sheetrock on the way, and make a mess you don’t feel like cleaning up. So, don’t say I didn’t warn ya:

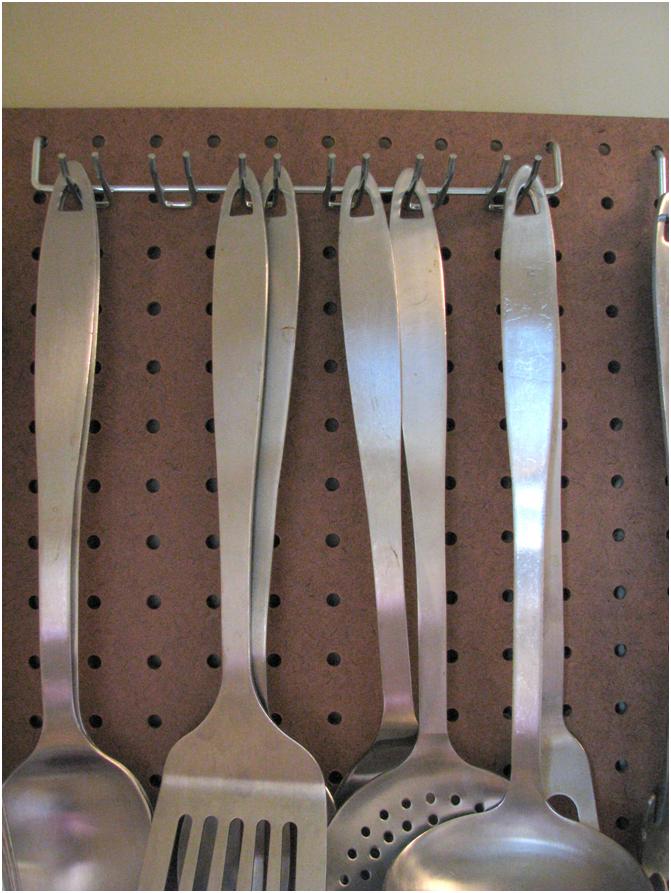
With a little experimenting, I managed to fit a boat-load of pots and tools on this small section of peg-board:


I especially like the screwdriver hook that I use for my meat thermometer:

And this hook section for my other tools:
I even found room for the box grater:

Obviously, the one drawback of this pot rack is that it is not really designed for big, Dutch oven size pots, but luckily for me, I also have a big cubby of dead space above the refrigerator:

I know, weird, huh? I asked the lady who redesigned this kitchen what the heck she was thinking, and she claimed to have visions of a TV there someday. Why anyone would want a TV that high in the air, in a tiny kitchen, I will never know. Talk about a way to get a crick in your neck…
Are you looking for a way to get your kitchen organized for the new year? For about $20, you can create your own custom pot rack and free up some valuable cabinet space. This project was so easy, even a mechanical dunce like me could figure it out.
Just remember what I said about the whole stud thing…