Short-Cut Slow Cooker Beef Stroganoff for the Judgement-Free Zone

Ok, I know we are all supposed be cutting down on our processed food consumption. But we are in the middle of a damn quarantine, going to the grocery store is not the best idea, and even if I did, pickings are slim. Oh, just order groceries, you say? I don’t even want to into get into how well that is NOT working out. My husband kept wondering why my phone dinged 50 times yesterday, and I had to explain that was the Instacart shopper refunding all of the items Kroger did not really have, despite what the app said.

So, as every planned dinner idea crapped out with each successive ding, it was time for plan F.  I pulled a chuck roast out of the freezer, dove into my pantry, and settled on…*gulp* canned cream of mushroom soup.

Keep your judgements to yourself there, Karen. We all know you secretly have a crush on that Tiger King guy.

Anyway, this recipe only takes about 5 minutes to throw in the slow cooker, and other than the chuck roast, uses ingredients that you probably have on hand. If you don’t have sour cream, cream cheese or Greek yogurt would work in a pinch. I served it over egg noodles, but you can make do with other pastas as well. The Heathens love it, it’s easy, and while it probably takes my foodie street cred down a notch, there’s no shame here.

Short-Cut Slow Cooker Beef Stroganoff

Notes

Ingredients
  • 2 medium yellow onions, halved and sliced
  • 1 chuck roast, approximately 3 to 3-1/2 pounds
  • 2 (10-1/2 oz) cans condensed cream of mushroom soup
  • 1-1/2 tsp. seasoning salt (like Lawry's or Morton's)
  • 1 tsp. black pepper
  • 2 TBS Worcestershire sauce
  • 4 TBS ketchup
  • 1 cup sour cream
  • egg noodles or pasta for serving
Procedure
  1. Cut chuck roast into cubes (about 1-1/2 inches). Add onions and chuck roast to the slow cooker.
  2. In a medium bowl, combine soup, salt, pepper, Worcestershire sauce, and ketchup, whisking to combine. Add the soup mixture to the slow cooker, and stir until the meat is coated. Cover and cook on the LOW setting for 8 hours, or until the beef is super-tender.
  3. Just before serving, stir in the sour cream. Check for seasoning, adding more if needed. Serve over egg noodles, and if you are feeling extra-fancy, garnish with a little parsley.
Tried this recipe?Let us know how it was!


Chicken Alfredo Pizza with Caramelized Onions and Sundried Tomatoes

So, I mentioned on the blog yesterday that I was going to start posting some recipes and ideas just in case they may help people navigate the ways quarantine is limiting our abilities and pantrys. Chicken Alfredo Pizza was something I made frequently when the boys were young. It’s fast, easy, cheap, customizable, and can stretch two smaller chicken breasts to feed a family of 5. This week, I made two versions: one with caramelized onions and sundried tomatoes added, and one with just the chicken, garlic, sauce, and cheese for the picky peeps. Before I list the recipe, here are some ideas to customize it or hack it if the grocery store is still a wasteland:

  • You can use any cooked chicken or turkey, or even brown up ground chicken and crumble it. When all the meat was gone this week at Kroger, there was a whole wall of smoked turkey legs. In a pinch, you can remove the meat from those and use it.
  • Who says it has to be chicken? Our store still had plenty of frozen shrimp in stock. Just sauté some until just under done, because they will finish cooking on the pizza.
  • Pizza dough: Making your own is easier than you think, and as long as you have flour and yeast on hand, you can do it. Alternatively, buy the tubes from the refrigerator case, which is what I did up until the Heathens were no longer tazmanian devils 24/7. My Kroger also sells fresh balls of pizza dough in baggies, which is in the deli section where they store the pre-made soups, salads, and take-home entrees.
  • While this recipe calls for the caramelized onions and sundried tomatoes, you could add bacon bits, sliced peppers, red pepper flakes for spice, toasted bread crumbs for texture, spinach to sneak in some veggies,  or finish with a drizzle of balsamic glaze.

Just remember, until life settles down and our grocery stores can catch up, not every meal is going to be a Pinterest moment, nor is every recipe going to be a favorite of everyone in your household. I will say, though, that I think both experienced and less-confident cooks are going to come out on the other side of this having learned something new about the ways we shop and eat.

**Note–I doubled this recipe to make two the two pizzas seen above**

Chicken Alfredo Pizza

Notes

Ingredients
  • 1 ball or tube of pizza dough (basically enough so you can roll it out to the size of a half-sheet pan or a large pizza pan.
  • 1-1/2 cups shredded cooked chicken
  • 2 TBS olive oil (or butter)
  • 1 medium onion, thinly sliced
  • 1/2 to 3/4 of a cup jarred sundried tomato Alfredo sauce (regular jarred Alfredo works too)
  • 4 cloves garlic, minced (or a couple of teaspoons of the jarred stuff)
  • 1/4 cup sundried tomatoes, chopped (the kind packed in oil preferably)
  • 2 cups shredded mozzarella (or pizza blend cheese).
  • 3 TBS grated parmesan
Procedure
  1. Start the onions first: Heat oil in a small skillet over medium heat and add the onions and a small sprinkle of salt, stirring well. Reduce heat to medium-low and cook, stirring occasionally until they reach your desired level of caramelization.
  2. While the onions cook, preheat oven to 400 degrees F. Lightly grease a sheet pan or pizza pan with non-stick spray.
  3. Dust your counter and a rolling pin with flour and roll out your pizza dough to fit your pan, then transfer it to the pan. Bake the pizza  dough for 11 minutes, then remove from oven.
  4. Spread the Alfredo sauce evenly over the pizza dough, starting with 1/4 cup at first and adding more as needed. The amount of sauce you will need will depend on the size of your pizza and your preferences. You want a nice even layer of sauce, but try not to drown it.
  5. Distribute the chicken, onions, garlic, and sundried tomatoes over the pizza. Top with mozzarella and parmesan and return it to the oven.
  6. Bake an additional 7-10 minutes until the cheese is melted and starts to brown a little in spots.
  7. Let pizza rest about 5 minutes before slicing and serving.
Tried this recipe?Let us know how it was!

The Dirty Secrets–Pantry Meals, Cheap Meals, Canned Meals, and More for Tips for Your Quarantine Kitchen

Ok, I think we can all agree that food media and culture as a whole has changed in the past 20 years. We now have easy access to blogs, recipes, information, and research. Meanwhile, Michael Pollan and other researched-based advocates opened our eyes to the less-than-desirable aspects of processed foods and ingredients. We get to be seasoned foodies without ever having attended culinary school.

But the reality is that many people do not have the luxury to be selective about ingredients and methods, pandemic or not. They may live in food deserts with no access to fresh products (what would you do if the only store you could reach was Dollar General?), they may have inadequate funds, limited equipment, and lack the basics we take for granted, like reliable internet access for help.

When I first got married, I had recently birthed the Demon-Baby. My husband worked endless hours of overtime to keep us afloat, and I stretched our meager budget as far as it would go. And you know how I did that? Lots of processed products, canned products, protein stretching, and shortcuts. No shame in my game.

Those meals represented my efforts to provide us some semblance of “homecooked” meals, even if it was just a medley of frozen and canned ingredients hastily tossed together. Even before we got married, our college garage apartment produced many memorable bargain meals that we still recall with fondness: Bisquick cinnamon rolls and casseroles, sautéed chicken with Rice-a-Roni pasta, cheese omelets, and that time my husband and one of his best friends learned that splattering hot oil next to boiling liquid was a very, very, very bad idea.

As we all face uncertain weeks ahead, I thought I would dust off some of those meals and ideas. They are not really recipes per se, but ideas based on how I stretched our budget, made the most of processed foods, fresh food, and managed not to kill any of us.

  • Easy and Cheap Chicken Pot Pie: Stir together 2 cups cooked chicken (I often only used one chicken breast), 1 can cream of celery soup, 1 cup milk or half-and-half, 1 tsp. seasoned salt, 1/2 tsp. black pepper, 1 can drained peas, and 1 can drained corn. Using a box of refrigerated pie curst, line the bottom of pie plate with 1 roll of the crust. Pour in chicken mixture, top with the other roll of crust, crimping edges. Cut a hole or two in the top to vent. Bake at 400 F 35-40 minutes until top begins to brown. Rest 5-10 minutes before serving. (Or use any combo of canned veg you have).
  • Under $5 Corn Chowder: Stir together 1-1/2 cups milk or half-and-half with one can of cream-style corn into a saucepan over low heat. (The regular size can of corn, not the 7-oz baby size). Add 4 slices chopped ham from the deli (or 1/2 cup chopped diced and browned smoked sausage, or some cooked bacon), 1 can of sliced or diced potatoes, drained, 1 can whole kernel corn, drained, and salt and pepper to taste. Heat about 10-15 minutes, and stir in 1 cup grated cheddar until melted. Serve with bread or rolls if you can.
  • Chicken Squares: Combine 6-oz of room temperature cream cheese with 6-oz of room temperature margarine, 4 TBS milk, 2 chopped green onions and add 3/4 tsp. salt and 1/4 tsp. black pepper. Add 3 cups shredded cooked chicken, mixing well. Separate two tubes of crescent roll dough into eight squares (which is two of triangles still together for each). Press the perforated seam of each square together firmly to create a solid square of dough. Place a spoonful of the chicken mixture into the center of each square. Bring the dough corners to the center, pinching all the edges to seal. Bake at 350 F for 20-25 minutes until golden brown.
  • Pantry Spicy Tomato Soup and Grilled Cheese Sandwiches: For the soup, combine 3 cups Spicy V-8 juice, 1 can condensed tomato soup, 1 can condensed cheddar cheese soup, and 1 tsp. dried basil in a saucepan. Heat on medium, whisking occasionally until hot and combined. For the sandwiches: Combine one can of condensed nacho cheese soup with 1-1/2 cups fiesta blend shredded cheese. Spread a couple of TBS of cheese mix between two slices of bread, and brush outside of sandwiches with melted margarine or butter. Cook the sandwiches grilled cheese-style until golden. Slice on the diagonal and serve with the soup. *If you can get your hands on a baguette or sausage buns, make mini sandwiches for optimal dipping, which makes picky eaters happier. They like to dip stuff*
  • My Spaghetti Casserole was a staple and continues to be a go-to. I would serve it with frozen or canned green beans that I seasoned with what I had on hand. You can make garlic bread using the ends of a bread loaf or sandwish bread you need to use up. Brush bread with a couple of TBS of butter mixed with a 1/4 tsp. garlic powder and 1/2 tsp. dried parsley. Toast in the oven.
  • Chicken Fajita Chowder relies on mostly pantry-ready ingredients and you can reduce the chicken to stretch it further (the beans add plenty of protein). If you don’t have chips, cornbread is a good side, or even crackers.
  • You don’t get any more affordable than Salmon Croquettes. We would serve this with boxed mac and cheese and canned peas.
  • When I Was in a Bind: I often would throw together a couple of diced, cooked chicken breasts with sautéed diced onion and minced garlic, add a can of cream of celery soup, 2 TBS. lemon juice, 1 TBS Worcestershire sauce, 1/2 cup of milk, 1 tsp. seasoned salt and one 1 tsp. paprika. If I had any dried parsley or thyme, I added some. I’d simmer it for a bit and serve over wedges of cornbread.
  • Top Some Potatoes: Potatoes are affordable, and last if you store them properly. If you can bake potatoes, you can top them endlessly, like with shredded chicken or beef, BBQ sauce, and cheese (maybe chopped onion or even slaw for the adults). How about cooked chicken, broccoli, and cheese sauce (maybe with some bacon bits)? Cook frozen breaded chicken strips, dice them, toss with ranch dressing, top potatoes, and drizzle with hot sauce (and sprinkle of blue cheese if you can find it). Try potato tacos, with all the usual ground beef and taco fixings on top. Potatoes are the ultimate affordable canvas to stretch protein.

Other tips:

  • Bisquick and other pre-made mixes are often very cheap, and versatile for pantry cooking, especially if you are short on time. I’ve made many a casserole from on-hand cans and a mix.
  • Combo meals that combine proteins with starches and/or veggies allow you to stretch ingredients further. Think pot pies, Shephards Pie, casseroles, breakfast scrambles, hashes, stews, soups, etc. Eggs are the often least expensive per-serving protein there is.
  • Nearly anything can be transformed into hand pies/meat pies. If you need to clean out the fridge of leftovers, use refrigerated pie dough or frozen bread dough to create a “sweep the kitchen” hand pie night. Use leftover protein, starches, and vegetables, and convince your kids it’s like personal pizza night, but better. Same goes for grilled sandwiches/panini.
  • Ask yourself if what a recipe calls for is TRULY necessary. It may call for three cups of shredded chicken, but you could probably fake it with two. Out of fresh ginger? You could probably scrape by with a fraction of that amount of ginger powder. Will it be just like the recipe? No, obviously, but it could help you try and hit closer to the flavor profile than nothing at all. I frequently substitute fresh herbs with dried (decreasing the amount by half). Some skipping and substitutions can get you by, but remember, don’t be that butthole who goes onto a website and gives terrible recipe reviews after you do so. While being a pantry MacGyver can keep your family well-fed, it’s not fair to compare a hacked recipe to what the writer intended.
  • The good-looking chicken breasts in the refridgerated case are going to be the most expensive. For now, I’d go for the frozen bags (which are often smaller and less-than-neatly cut), or if you have the time, grab the cheap cuts like legs or leg quarters and cook and shred the meat for later.
  • When in doubt, trust dishes like Red Beans and Rice, Jambalaya, Stewed Chicken and Rice, Beef Tips, Meatloaf, etc. They are classics for a reason.

So, these are just some basics from the early days extreme budget eating that I hope inspire anyone struggling under quarantine frustration or scarcity. If you have questions about this post or how to stretch what you have, leave a comment, or if you prefer to ask a question privately, drop me an email (check my profile for the address).

Keep calm and drink on, my friends.


A Starter Pork Rub Recipe and a Memorial Day Menu Link Round-Up


So, I’m firing up the smoker for the holiday weekend, and here’s the skinny on the menu:

I’m smoking several racks of ribs in The Beast, using an adjusted pork rub recipe (see that recipe at the end) and this BBQ sauce recipe from Burnt Finger BBQ. I really love the addition of the thyme and the oregano in this sauce, as helps develop a more complex flavor that goes beyond the traditional too-sweet or too-vinegary commercial brands. It is one of the most balanced sauces I’ve tried in terms of flavor.

Side Dishes:

  • Baked Beans from Pioneer Woman’s A Year of Holidays cookbook. Unfortunately, I could not find an original link for this online. Her first recipe on her site from 2009, as well as the recipes you find on Food Network, are different from what appears in this book. This version was the one I tried several years ago and Husband will accept no deviations.
  • This coleslaw recipe is as basic as it gets, which is exactly why I love it. I make plenty of specialty or spicy coleslaws depending on the menu, but this one is dependable and plays well as an accompaniment to the bolder flavors of a traditional BBQ menu. Also, one bag of corner-cutting coleslaw mix is perfect for this amount of dressing. This is a minor step-up from KFC but close enough to appeal to all.

  • I’m experimenting with this corn salad recipe, also from Food Network. Bean loves corn like I love my Diet Coke. But, there’s only so many times I can Instant Pot corn on the cob before I want to tear my hair out. Hopefully, this will be a compromise. I’ll post a final review after I feed the horde.

Moving along to the current version of the pork rub I use, which is essentially Melissa Cookston’s recipe with a minor variation. Not only is Melissa a BBQ goddess, but out of the 25 BBQ cookbooks I own, her seasoning profiles are the ones I keep coming back to when I need a starting point or inspiration. I use this for ribs and pork butt.


Sweet Memphis Style BBQ Rub

Notes

Ingredients
  • 1 cup turbinado sugar
  • 1/2 cup white sugar
  • 1/2 cup kosher salt
  • 1 TBS onion powder
  • 2 TBS granulated garlic
  • 1 1/2 tsp cayenne pepper
  • 1 tsp black pepper finely ground
  • 2 tsp dry mustard
  • 1/4 cup chili powder
  • 1 tsp ground cumin
  • 1/4 cup paprika
  • 2 TBS smoked paprika
Procedure
Lightly grind turbinado sugar on coffee grinder of processor until lightly powdered. Combine sugar with remaining ingredients, stirring well until incorporated.
Tried this recipe?Let us know how it was!

So there ya have it. What’s on your holiday menu?

Chicken & Spinach Lagagna Roll-Ups

It’s the last week of school, and needless to say, it’s crazy busy around here. However, I took some time today to cook one of the Heathen’s favorite dishes: Chicken & Spinach Lasagna Roll-Ups. This super-easy meal gets a fast flavor cheat by using ranch dressing mix to season the chicken and spinach filling. I prepped it in the morning so all I had to do was pop it in the oven, and serve it up with a side salad and some garlic bread. And wine. Lots of wine. Did I mention it’s kinda crazy around here right now?

Chicken & Spinach Lasagna Roll-Ups

Notes

Ingredients
  • 2 (8-ounce) packages Neufchatel cream cheese, room temperature
  • 2 packages powdered ranch dressing mix
  • 2 boneless, skinless chicken breasts, cooked and shredded (or about 3 cups of cooked chicken)
  • 1 (12-ounce) bag of frozen chopped spinach, thawed
  • 1 box lasagna noodles, cooked according to package directions (about 15 noodles)
  • 2 (8-ounce) cans tomato sauce
  • 1 cup half and half OR 1-1/2 cup heavy cream
  • 2 cups grated mozzarella cheese
Procedure
  1. Preheat oven to 325 degrees. In a medium-sized bowl, combine cream cheese and ranch mix until incorporated. Remove about 1/3 cup of this mixture and set aside.
  2. Add chicken and spinach to the bowl, stirring until the mixture is well blended.
  3. Carefully spread about three to four tablespoons of the chicken mixture onto each noodle. From the narrow end, roll up each noodle and place seam side down into a casserole dish
  4. Combine reserved 1/3 cup cream cheese with tomato sauce, whisking until blended. Add half and half OR cream, stirring to combine.
  5. Pour sauce over roll-ups and cover the casserole with foil. Bake for 25 minutes. Sprinkle cheese over roll-ups and re-cover loosely with foil. Bake an additional 10 minutes, or until hot and bubbly.
Tried this recipe?Let us know how it was!

Cook’s Notes:

  • I cook for 6 people every day, three of which are hungry guys, so I tend to make a lot of food. You can easily half this.
  • Don’t forget to add salt to your pasta water. Salting the pasta water separates the good pasta cooks from the not-so-good pasta cooks.
  • To make the noodles easy to work with, lay out some foil or parchment paper on the counter and spray with non-stick spray. After you drain the noodles, lay them out in a single layer on the foil to prevent sticking.
  • Cook a few extra lasagna noodles. Inevitably, some will tear during the cooking process, so it’s good to have backups.
  • Grab a rotisserie chicken to cut the prep time if you want. I cooked a big batch of chicken in my Instant Pot and used the rest to make chicken salad.
  • Variation ideas: Add roasted red peppers or sundried tomatoes to the chicken mixture. Top with jarred alfredo sauce instead of the tomato sauce. Substitute chopped cooked shrimp or turkey for the chicken. Garnish with a little chopped basil or parsley.

Summer’s End–Family, Community, and Canning.

School started this week, and for the first time, its arrival felt bittersweet. Usually, by this time, I feel like I will sell my soul to their teachers in exchange for removing the Heathens from my home for a few hours a day. August means we’ve devolved into who-looked-at-who the wrong way, which in turn, ends up being a crossover between “Who Moved My Cheese?” and The Hunger Games.  This year, however, summer seemed to fly by at a too-rapid pace. It doesn’t help that G-Man is a junior, Bear is a freshman, and Bean is in (gulp!) first grade. I wish I had a few more days at the pool or the camp, but in the end, the promise of less than 100-degree heat means that I’ll get over it quickly. So, the summer recap:

We had our epic family reunion with my 80-plus cousins who are just as zany as we are, fun days at the Gulf and the camp, questionable fishing, and general mayhem:

There was some knitting, which I will post about tomorrow:

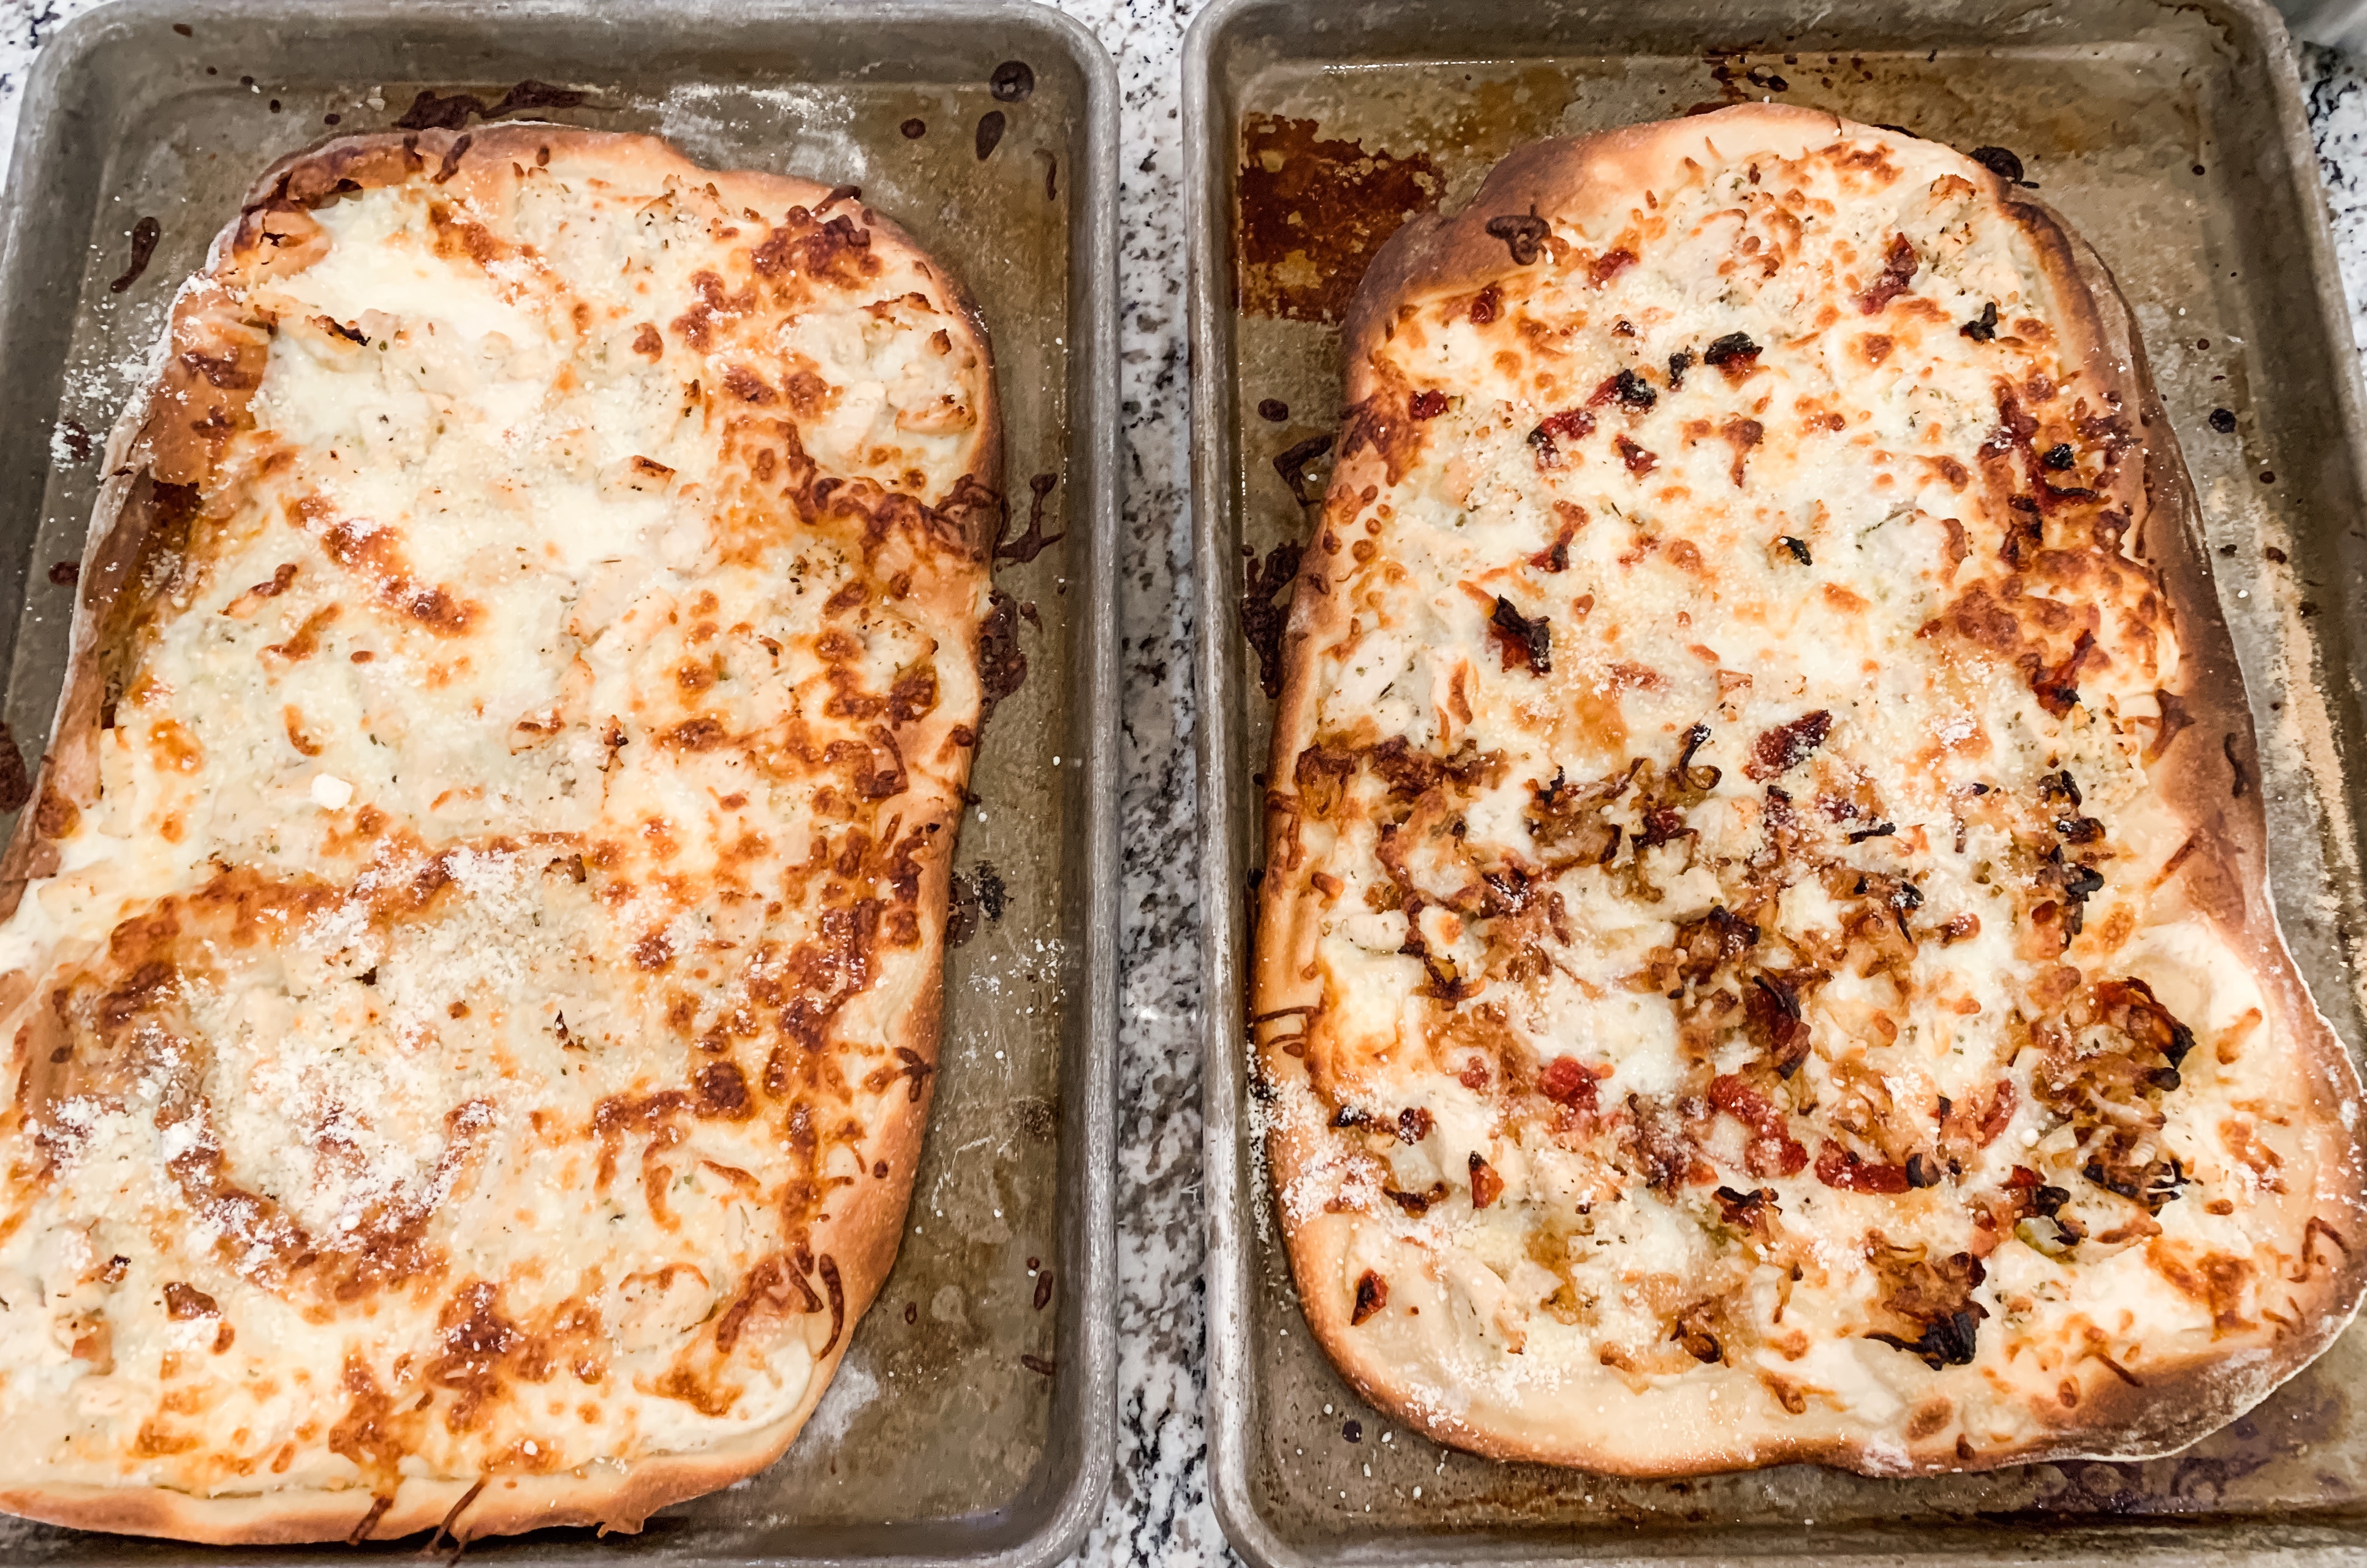
I smoked and cooked at bit (including hosting 4th of July for our neighborhood, and tackling fresh pasta):

But, if I had to sum up this summer, I would call it The Summer of Canning. We spent the spring installing and planting several raised beds in our postage stamp-sized back yard. We hope to adopt a year-round gardening plan down the road, but ultimately, I think the Husband and I feel called to find a balance between the frantic digital pace of modern daily life, and the skills, traditions, and values that we internalized from our parents and grandparents.

We want to raise well-balanced, knowledgeable kids that have adequate life skills by graduation, or at least some exposure to many things and the attitude that they can figure crap out if they try. This isn’t just about gardening. G-Man must have changed tires on the family car six times this summer as we dealt with failing tires and those pesky nails the contractors down the road kept dropping. He also has a bank account, and I’ll send that kid to the Kroger at the drop of at hat, which means he now knows where to find vinegar and pectin, and the difference between a poblano and a banana pepper. G-Man and Bear can cook a meal, bake a mean cookie, and follow a recipe while adapting if needed. As such, the garden is another extension of our desire for fresh produce and deliciousness, while modelling life skills that might keep our kids from being left for zombie bait in the event of a Walking Dead scenario. Kidding…Kidding…

But, with that garden, came the dilemma of keeping up with it. I swore to the Husband that I would not let his efforts go to waste. I’ve written about canning before, but this behemoth was beyond my ability to manage, or at least my available time. But then, the blessing came. My neighbor had never canned and wanted to learn, so I did a quick recipe with her (that she brought over) so she could get the basics. One thing led to another. Before long, we transformed into a well-oiled operation of shared labor and shared bounty. We worked side-by-side each week, harvesting, prepping, and putting up recipe after recipe. We fought the bugs, the heat, our restless kids, and the burn of hot peppers from forgotten gloves. As the days blended together, we visited, shared stories and memories, and ended up with overflowing pantries of salsa, jalapeno jelly, serrano jelly, pickled peppers and onions, cucumber relish, pickles, spicy tomato jam, pickled jalapenos, and more.


We even put together and vacuum-sealed bacon-wrapped jalapeno poppers for fall and winter entertaining. A full pantry and freezer soothes my soul and makes me feel more connected to the strong women in my family tree. That was something I didn’t expect, but I’ll take any day.

Over these intense kitchen sessions, I noted to my neighbor that I can now see why chores like canning, quilting, butchering, and harvesting historically often turned into group events. People helped their neighbors or friends with these labor-intensive activities not only to share the load, but also to connect in a way we now have lost, and which we often miss in our disconnected, overworked, digital lives. (and yes, I get the irony of saying that on my digital blog, but I do believe we can all find a better balance between the power of the internet to connect and educate us, and the temptation for it to consume us at the expense of genuine experiences). Whether we were enveloped by steam from the canner, or got lost in the hours of chopping 12 pounds of tomatoes at a time, we strengthened our bonds as both friends and neighbors in a way that made me feel closer to her, and my family’s history and traditions.

So, as I come to summer’s end, I still feel like it flew by, but as I reflect, I also think of it as time of connecting with family and neighbors, cultivating skills, and transitioning from the tragedy of losing my father to letting the light back in. That, if anything, was probably the best takeaway of all.

But you know what’s even better about summer’s end? I can now plan the Halloween decorations and party. Mwhahahah!

Shoepeg Corn Salad–Cool Food for a Hot Day (And a Nearly Effortless Potluck Side Dish)

We had our family reunion last weekend, which is always such a fun and blessed time. We cooked, we laughed, we ate, we played games, and mostly, we continued the tradition of togetherness that my grandmother and her siblings created for us. It’s easy to get lost in the stress of the day-to-day, but when you come together with about 80 of your nearest and dearest, it’s a good reminder about remembering what’s important.

Anyway, I made a few dishes to contribute to the weekend, and this salad was a big hit. It’s a crisp, cool dish that is the perfect antidote to the hot summer days. It’s also an ideal contribution for potlucks. If you need a refreshing salad that is sure to help beat the heat, this is it!

Shoepeg Corn Salad

Notes

Ingredients
  • 2 cans shoepeg corn, drained
  • 1 can English peas, drained (preferably Le Sueur brand)
  • 1 bunch green onions, chopped
  • 1 bell pepper, chopped
  • 1 cup chopped celery
  • 3/4 cup white vinegar
  • 1 TBS water
  • 1/2 cup vegetable oil
  • 1/2 cup sugar
  • 1 tsp. salt
  • 1 tsp. black pepper
Procedure
    1. In a large bowl, combine corn, peas, green onions, bell pepper, and celery, stirring gently to combine.
    2. In a small saucepan, combine vinegar, water, oil, sugar, salt and pepper. Bring to a boil over medium-high heat, and remove the mixture from heat as soon as it begins to boil. Let cool.
    3. Pour vinegar mixture over corn mixture, stirring to combine. Refrigerate at least 6 hours, better if overnight.
Tried this recipe?Let us know how it was!

Friday Eating and Reading (As I Army-Crawl Across the School Year Finish Line)

It’s Friday, and I am still in the trenches of what we call the May Gauntlet around here. This month consists of three of my family of five’s birthdays, Mother’s Day, another trip to Science Olympiad Nationals for the Hubs and Bear after winning State, Confirmations, graduations, finals for G-Man, driving test for G-man, and yet another week-long business trip for the Hubs. I am, in a word, overdone.

Meanwhile, I’ve been sneaking in crafting, reading, and knitting time in at every possible moment, lest I allow my “End-of-the-year-and-I’m-over-it attitude” to spew out all over innocent bystanders. While I know I will probably want to let my kids run away and join a circus within two weeks of summer vacation, the prospect of a break from carpool lines, packing lunches, the daily uniform search/6 a.m. emergency washing panic, and unplanned trips to the school because I forgot it was our snack day (again), is the only thing separating me from insanity.

Anyway, here’s a few things I have been really into this week:

I just finished The Wishing Thread by Lisa Van Allen. Magic realism and knitting? Sign me up. I am a big fan of Sarah Addison Allen, so this seemed right up my alley. Overall, it’s a cute book, and one that I enjoyed. The narrative of the family ties, local lore, the subtle magic, and hope all made this a nice, pleasant read. If you just want a light, feel-good read similar to Addison Allen’s works, this is a good option.

I love Rick Bragg, who, among his numerous writing accolades, also has his essays featured in Southern Living every month. I’m only about a quarter of the way through this, but I am so totally in love with it. His writing brings to life the essence of the times and influences that defined my grandparents and parents (both good and bad). I started this on Mother’s Day morning, and it felt like a bittersweet balm on my soul. It reminds me of cooking with my mom, and all the stories she would tell of our grandparents and cousins, and the recipes that were simply learned by doing. I still suck at this whole grief thing, especially since I got the grief sandwich going on, but this book reminds me that the stories and traditions mean they will always be with me.

This orzo salad from Food Network definitely wins our dang tasty seal of approval. While I skip the red onion because picky eaters gonna pick, the recipe is perfect for a cool summer side dish (very important when we will reach nearly 100 degrees next week). A couple of notes on this one–I just mix the whole shebang together rather than this pointless staging. You would have to mix it before serving anyway, and artistic efforts are lost on The Heathens. Also, I have a possibly controversial view on pasta salad recipes. I always make 1.5 times of the dressing that any pasta salad recipe calls for, if not 2 times because they always end up drier than I want if I follow the recipe. Thus far, my over-doing-it on pasta salad sauce (for creamy-type sauces) hasn’t steered me wrong. You could also add rotisserie chicken to this for a complete meal, but if so, I would definitely double the sauce just to be safe. No one ever said “My Pasta Salad is too creamy.”  If they did, you should seriously side-eye them.

Time to fortify myself for the last week of school. That means whiskey, in case you didn’t know.

Chocolate Sheet Cake with Chocolate-Pecan Icing

I was missing Mom yesterday, so I decided to bake her chocolate sheet cake. This recipe is so dang easy, and the rich texture and decadent icing make it the ultimate comfort food when only chocolate will do. I used to inhale this for dessert with a big glass of milk, and it was one of the baking staples in my mom’s cooking routine.  She used to tell me that my grandmother would bake this cake every Friday so that she would have something chocolate for her five kids to snack on over the weekend.

I like it with the pecans, but you can leave them out of the icing or substitute them with another chopped nut of your choice.

Chocolate Sheet Cake with Chocolate-Pecan Icing

Notes

Ingredients
Cake
  • 2 cups flour
  • 2 cups sugar
  • 1/2 tsp. salt
  • 1/2 cup buttermilk
  • 2 eggs
  • 1 tsp. baking soda
  • 1 tsp. vanilla
  • 1 stick butter
  • 1 cup water
  • 1/2 cup shortening
  • 3 TBS cocoa
Icing
  • 1 stick butter
  • 3 TBS cocoa
  • 1 box of powdered sugar (1 pound)
  • 1 tsp. vanilla extract
  • 6 TBS milk
  • 1 cup chopped pecans
Procedure
  1. Preheat oven to 350 degrees. Grease and flour a 9x13 cake pan.
  2. In a large bowl, stir together flour, sugar, and salt and set aside. In a separate bowl, whisk together buttermilk, eggs, baking soda, and vanilla. Set aside.
  3. Place butter, water, shortening, and cocoa in a medium saucepan. Cook mixture over medium-high heat until butter and shortening are melted and mixture begins to boil. Remove from heat and immediately pour cocoa mixture into the flour fixture, whisking until combined. Add the buttermilk mixture and whisk until fully incorporated. Pour batter into prepared pan and bake for 20 to 25 minutes. Prepare icing while cake cooks because you will pour it over cake when it comes out of the oven.
  4. To make icing, melt butter in saucepan on medium-low. Add cocoa and stir until smooth. Add powdered sugar and vanilla, stirring well. Add the milk and whisk until smooth. Stir in pecans. Pour evenly over warm cake and it will set as it cools. Enjoy!
Tried this recipe?Let us know how it was!

Community Cookbook Throwback Thursday–“Carrot Fritters”

**If this is your first visit, here’s the intro to my CCTT project.**

So, this week’s CCTT recipe comes from Talk About Good! which was published by the Junior League of Lafayette in 1967. Since it’s original publication, it has undergone 31 additional printings, with nearly 800,000 copies sold. This was another book I remember from Mom’s collection, and I managed to snag it at a local bookstore, giving me hope that I can recover some of that history. It definitely embodies the time period, with recipes that are staples, as well as curiosities that definitely show their age. In these recipes, I am learning more about my Mom and grandmothers, because they showcase a generation on a bridge. The rise of processed foods clearly has an impact, yet I can still see the traditions that stood the test of time. For example, my mom was convinced margarine was way better for you, but Hamburger Helper was for sad people who just didn’t know any better. In essence, she was a total purist with a blind spot for convenience foods that made life easier (I’m looking at you, canned biscuits). On to the matter at hand…

The devil-cold I thought I beat last week came raging back this week with the vengeance that only a secondary infection can bring, so I selected an easy recipe for this week. That’s also the reason I’m a day late with this post. Give me a demerit, with a chaser of decongestant, please. And alllllll the whiskey.

These “Carrot Fritters” were submitted by Mrs. Avery G. Landry and Ida Moran. The Heathen’s like carrots, and the husband can put a serious hurting on a traditional carrot soufflé, so I figured this was a safe bet for continuing to ease them into the prospect of regular kitchen experimentation.

The verdict? See the notes.

**Remember, I will copy the recipe exactly as written and provide my own notes, alterations,  and observations after**

Carrot Fritters

Notes

Ingredients
  • 1-pound bag of carrots
  • 1 cup flour
  • 1 tsp. baking powder
  • 1/4 cup milk (scant)
  • 1/2 cup sugar
  • 1 tsp. vanilla extract
  • 2 tsp. butter
  • 1 egg
Procedure
  1. Boil scraped carrots until very tender. Chop hot carrots with dough blender until smooth, adding sugar and butter while still warm. Add egg and vanilla, blend in flour and baking powder and mix with a spoon. Add scant amount of milk, so that batter has consistency to be dropped by spoonfuls into hot cooking oil (this is not deep fat frying). Browning takes about 5 minutes.
Tried this recipe?Let us know how it was!

My Notes

  • Ok, so to make this recipe clear, you want to cook your chopped carrots until tender (scraped just means peeled, but I don’t peel my carrots, so take that for what it’s worth). After that, I streamlined the recipe as follows:
  • After reading the recipe, I decided the food processor was the tool for the job. I put the butter and sugar in the Cuisinart, then added the cooked and drained carrots. I pulsed it briefly, then left it alone for about 5 minutes to cool off. (I did not want the egg to scramble in the hot mixture)
  • Next, I added the egg and vanilla, pulsed about three times, then added the flour and baking powder, and pulsed a couple of more times. Finally I added the milk a few tablespoons at a time (to be careful), but I ended up using all the milk. The result is a batter on the thicker side, and is cross between a fritter and a thick pancake.
  • I used a pretty large non-stick skillet and about a 1/3 to 1/2 cup of vegetable oil, which I heated on med-high heat. I dropped about an ice cream scoop-size spoonful of batter into the oil and browned the fritters on both sides, about 2-3 minutes per side.
  • These definitely taste like carrot soufflé fried like a pancake or fritter, which my husband loved. If you like carrot soufflé, you will love them.
  • The sugar content in these makes them brown fast and easily burn. You have to keep an eye on them and cook them at a slightly lower temp than you would cook traditional pancakes or fritters.
  • I thought they were a little too sweet, but everyone else loved them. Next time, I would add a pinch of salt to balance the sugar content, and I would try them with brown sugar instead of granulated to add a depth of flavor.
  • Finally, this recipe made about 5 decent-sized fritters for our family of 5, but they are so rich, this was PLENTY. I was worried, but one per person is a safe bet.
  • If you try a CCTT recipe, let me know! Also, if you have a vintage recipe to share, let me know too!