Lucky Me!

A few weeks ago, my friend J called and told me that she had another friend with furniture to off-load. Furthermore, this friend had a piece of furniture that would look great in my breakfast room, and wanted no money for it.

Needless to say, I was skeptical. Free furniture typically means that the pieces in question are old, cheap, falling apart, or a cosmetic nightmare. I certainly did not have the time to refinish, repaint or otherwise re-do anything. However, I was also in a budgetary drought, so I told J I would consider it if I found time to run by and see this mysterious piece of furniture.

I had nearly forgotten about this conversation, but one Saturday afternoon, J and her mom show up at my house with her mom’s truck.

And they unload this beauty into my breakfast room:

I contained the urge to kiss her…barely. That’s one freebee I could never turn down, and thank goodness she knew better than I did.

I won’t describe my embarrassingly perverse happy dance at my free piece of furniture. Some things you just don’t want to know….

A Vocabulary Lesson

in·doc·tri·nate

[in-dok-truh-neyt]

–verb (used with object), -nat·ed, -nat·ing.

1. to instruct in a doctrine, principle, ideology, etc., esp. to imbue with a specific partisan or biased belief or point of view.

2. to teach or inculcate.

3. to imbue with learning.

________________________________________________________

My 8 year-old son came home from school yesterday with a new library book….

Instead of Harry Potter, Pokémon, or some other appropriate flight of fancy, my heathen brought home this:


Yep, it’s a cookbook, alright…


I was entertained all through dinner prep by his running commentary of all recipes we were going to try this weekend. It reminded me of an incident that happened with my 6 year-old heathen during Christmas break. My husband, in a thoughtful, romantic way, took the kids to the store, and bought me this magazine as a treat while there:


Before I even came home from work, however, my youngest hijacked this magazine, and WOULD NOT relinquish it. He carried around for a week, showing anyone and everyone all the cookies he wanted to make.

Anyway, as I got dinner in the oven last night, and as my oldest was chattering on about his burger plans, my youngest asks me to turn on some television for him to watch before dinner. And what does my 6 year-old monkey ask to watch?


Food Network.

Either I am doing my job right, or I am raising a couple of weirdos

My Incredibly Long Learning Curve and the $3 that Bought Peace in an Epic Test of Wills

From the early days of living with my husband, we have been engaged in an epic coffee war. This battle has taken many forms, and though I know my OCD-ish-ness is at the root of the conflict, I still secretly think he gets a kick out of driving me bonkers.

Phase 1 of the coffee war started with the dreaded “coffee spoon.” After stirring his coffee, my husband would set the wet spoon back on the counter, thereby leaving a small puddle of sugary coffee of that would dry into a sticky eyesore. Not only was this annoying and gross, but he never set the spoon in the same place twice. I always woke up to a trail of small, congealed coffee puddles across my counters. In the typical, passive-aggressive manner of early marriage, I stewed about the fact that he never wiped up these puddles until, one, day, I erupted into a tantrum of tears and fussing that made me look like a screaming banshee. I actually threatened to go to his office and dirty up his desk, so maybe he would see how it felt for me to wake up to my kitchen (obviously a poorly-drawn metaphor) being messier than I left it.

I know, it sounds pretty silly, but as a housewife who practically never left the house (1 car, country home, dead broke), I had plenty of isolation to feed my obsessive ability to stew.

The poor man actually did break the coffee-spoon habit, but soon after, we entered Phase 2 of the coffee war.

I had several large storage canisters, in which I kept all the baking essentials. One of these was, you guessed it, a sugar container. One day, I started to notice little brown crystals gunking up my sugar. I came to realize that my husband was double-dipping his wet coffee spoon into the sugar canister, thereby leaving coffee-infested sugar clumps.

You just thought I was a screaming banshee the first time…it’s amazing the poor guy is still married to me, because I probably would have reconsidered if I realized how psycho I was acting. Shock and awe had nothing on me.

Eventually, I resolved this issue by purchasing a smaller version of the sugar container, so he could have his very own bowl of sugar to gunk up. See, I can compromise…

However, Phase 3 soon came along…I began to notice an occasional dusting of sugar on the counters and floors. In the rush to make coffee while getting ready in the morning, some sugar inevitably fell off the spoon on the way from the sugar bowl to my husband’s coffee cup. Sugar on the counters, sugar on the floors, sugar driving me bonkers…it was mayhem, I tell you!. And yes, I acknowledge that this tiny amount of practically microscopic sugar would only come to the attention of an obsessive harpy like me.

Finally, as I was refilling my husband’s sugar container over Christmas break, and grumbling about it, my mom looks at me and says, “why don’t you just get him the jar sugar container that diner’s have? That way he can pour the sugar directly in his coffee…they are like three bucks at Target, ya know.”

*crickets*

Are you bleeping kidding me? Nearly nine years of marriage, and I am JUST NOW discovering the solution to the coffee war? WHY did I not think of this sooner?

Stand down sister, because peace has been negotiated.

Don’t worry though…I’m sure I’ll find something else to obsess about next week.

My Cure for a Small Kitchen, Limited Cabinet Space and an Empty Wallet

When our old house burned down in 2004, I basically got to rebuild it to my liking…within the confines of a very tiny insurance policy, of course. One way I splurged was by redesigning the kitchen layout to be a more open floor plan, leaving room for an island with a pot rack above it. I found a beautiful, but cheap pot rack at a home improvement store, and paid one of the carpenters $40 under the table to hang it correctly. This process involved chains, attic rafters and other things that my pregnancy brain did not want to worry about. It was $40 bucks well-spent though, because that rack did not flinch from having all my pots dangling from it. The rack also looked amazing; so much so that the lady who bought our house insisted that the island and rack stay as part of the deal.

The kitchen in the new house is definitely on the smaller side, and when we moved in, I was too tired and broke to think about adding islands or pot racks…I was lucky not to have to sell my soul to the moving company, let alone fork over more cash for the kitchen. My husband and I solved this issue almost immediately by creating this:


This wall was practically dead space, because to the left of this area is the back door. Therefore, no furniture could fit in this space without compromising the doorway, new cabinets included. With a little imagination and about $20 worth of materials, we made this area into a customized pot rack, thus solving the immediate problem of lots-of-stuff meets tiny, historic-home-kitchen.

First, we measured the wall and figured out how much space we had to work with. Then, we bought a sheet of peg-board from the local Lowes, and even had them cut it to size in the store. We could have painted the board if I had wanted to, but I thought the light brown color was just fine…besides, paint costs money and money was thin on the ground after the movers finished bleeding us dry. We also picked up a variety pack of peg-board hooks and accessories while there.

When we got home, my husband figured out that the peg-board needed to sit approximately ½ inch off the wall so that the hooks had room to attach and detach. He resolved this issue by stacking washers between the peg-board and the wall:

Once we had the peg-board figured out and positioned, my husband simply screwed it into the wall at various intervals around the border, making sure he was screwing into the studs. Should you ever try this, please understand that you have to secure any type of pot rack to a stud. Otherwise, the weight of the pots will probably rip the thing down, destroy some sheetrock on the way, and make a mess you don’t feel like cleaning up. So, don’t say I didn’t warn ya:

With a little experimenting, I managed to fit a boat-load of pots and tools on this small section of peg-board:


I especially like the screwdriver hook that I use for my meat thermometer:

And this hook section for my other tools:
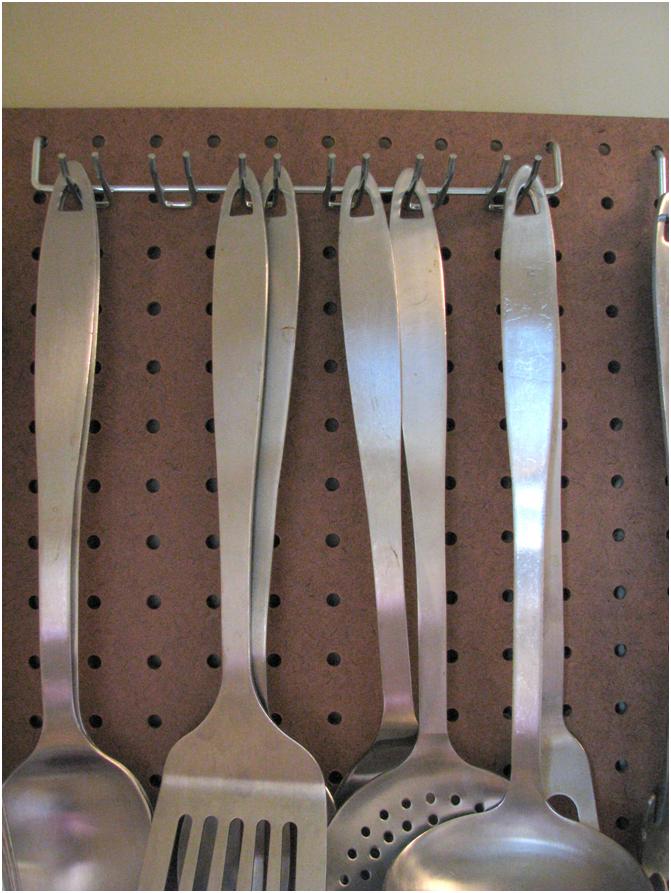
I even found room for the box grater:

Obviously, the one drawback of this pot rack is that it is not really designed for big, Dutch oven size pots, but luckily for me, I also have a big cubby of dead space above the refrigerator:

I know, weird, huh? I asked the lady who redesigned this kitchen what the heck she was thinking, and she claimed to have visions of a TV there someday. Why anyone would want a TV that high in the air, in a tiny kitchen, I will never know. Talk about a way to get a crick in your neck…

Are you looking for a way to get your kitchen organized for the new year? For about $20, you can create your own custom pot rack and free up some valuable cabinet space. This project was so easy, even a mechanical dunce like me could figure it out.

Just remember what I said about the whole stud thing…